Tuesday, June 19, 2012

Thai Chicken & Peppers


I've made this dish twice and love it every time.  I love it so much I wonder why I don't make it more.  A handful of key ingredients come together for a quick and filling supper.  I like to use the plain frozen brown rice that cooks in 3 minutes in the microwave bag, makes this dish even easier.  I give full credit to the wonderful Rachel over at Rachel Cooks Thai for her recipe and inspiration.  If you like Thai food, check her out, she has lots of good recipes for cooking Thai food in America.  Thank you to Karla and Megan for showing me her blog!!


 nam prik pao--imported all the way from Bangkok in my suitcase :)

 stir fryin' in my Scanpan!

  
 Makes 3 servings

Gather:
1 cloves garlic, chopped 
2 cup chicken, sliced in strips or cut into chunks
2 Tablespoons roasted chili paste (nam prik pao)
1 teaspoon fish sauce
1/2 cup red and yellow bell peppers, sliced in strips
1/2 cup Thai basil leaves (or regular Italian basil)
roasted chili flakes 
Instructions:
Saute the chopped garlic over medium high heat until fragrant, 30 seconds.
Add the thinly sliced chicken, roasted chili paste, and fish sauce.  Mix together and cook until the chicken is almost done.
Add the bell peppers and continue to cook until the chicken is done and the vegetables are cooked but still firm.  
Add the basil and if you like some heat, the roasted chili flakes.  Take off the heat and serve with brown rice. 

I used the Thai basil growing on my patio, that I got at Lowe's.  Someone just had to check it out...
what's this..smells good..


Pin It Now!

Saturday, June 16, 2012

Eat, Drink & Sun in Hawaii

Although I was there for work, I did get to have some fun while in Hawaii for two weeks.  I stated near the Honolulu airport at a hotel I would not recommend, but it was close to all the rental car places.  Getting a rental car is something I would recommend if planning a trip to Hawaii.  It wasn't necessarily easy to get around, but having a rental car gets you away from the mega-tourist places and lets you explore some of the beautiful off the beaten path places.  The locals are rather friendly drivers, everyone on the island seems in no big hurry to get or do anything.  That is true everywhere except from 7-10am trying to get downtown Honolulu.  Try to avoid that time, its rated as the top worst traffic jams in America.  But back to the fun stuff, here is my top list of things to do and see while in Oahu, hopefully I can plan a trip back and do more than one or two of them!!

1.  Go Surfing!
I had an absolute blast learning to surf.  It was my first time on the board and taking a surf lesson was definitely worth it.  My friend and I used the Waikiki Beach Services in front of the Royal Hawaiian Hotel on Waikiki Beach.  Our teacher took us out to a sand bar with waist high water and we caught some easy waves.  Waikiki as well as White Plains Beach are known for easy beginner waves.


2.  Remember Their Sacrifice
You can spend a couple hours at the Pearl Harbor Museum.  You can take a tour of a submarine, the USS Bowfin, watch a movie and take a ferry boat ride out to the USS Arizona Memorial, as well go across the bay to Ford Island to see the USS Missouri Battleship and another memorial.  It's better to get their early because the tickets to see the movie and the USS Arizona Memorial are free but given out first come first serve.
USS Bowfin
Ferry ride to USS Arizona Memorial
Memorial


USS Missouri Battleship


3.  Try some local joints!
I really enjoyed the Koa Pancake House for their breakfast and lunch plates.  You can get some interesting local stuff like banana pancakes and Portuguese sausage or even mahi mahi for breakfast!  Also, the plate lunch is popular in Hawaii, usually rice and some sort of meat or fish.  I had a plate lunch with spicy tuna and a side salad from Ninja Sushi.  Very good and fresh.  Check out Dixie Grill for some great BBQ, crab and drinks, especially their signature 34oz Mai Tai's!

Breakfast of champions
Plate Lunch
Screamin' Mai Tai

4.  Find authentic Shave Ice
Not to be confused by "shaved ice", Hawaiian shave ice is fluffier than traditional snow cones and very good! There are options to get sweet beans or ice cream at the bottom of your ice, I went with ice cream and it was delicious!  The syrup comes in tropical flavors like pineapple, coconut, mango and guava and is perfect on a sunny day.


5.  Enjoy a drink on Waikiki Beach
Although a tourist hot-spot, Waikiki Beach is picturesque and a fun time.  There are many restaurants to choose from as well as high end shopping up and down the main drag.  Duke's Grill, named after the Father of Surfing, is a classic place to grab a fruity drink and enjoy a meal overlooking the water.


Sunset

6. Snorkel at Hanauma Bay Nature Preserve
I didn't get to make it in the water, but I have it on good authority that Hanauma Bay is the place to be.  It has great snorkeling where you can see turtles and lots of fish.


7.  Drive the coast
We took a drive around Oahu on Hwy 72, stopping at Halona Blow Hole first.  There is a place to pull over and people stand by the rail watching the waves crash under this rock formation.  When two waves crash against the rocks close together, water is forced through a small hole, spraying water just like a whale would.  It is fun to watch and take in the sun.  Also we stopped at another scenic overlook further down Hwy 72 to take in the beautiful views.

Looking out to Sea Life Park (where 50 First Dates Adam Sandler's character worked at)
Blow hole rock
Look out positions carved up the mountain, Marines would hid in their to protect the land during WWII


 8. Visit a Japanese Temple
Take an hour or two and visit the Valley of the Temples Memorial Park to see a Japanese cemetery and temple.   The Byodo-in Temple is a replica of the 950 year old temple in Japan.  You can even take off your shoes and go in the temple and see the Buddha.


Ringing the gong


Feeding the swan

I'm sure there are other fun things to do on Oahu, but these are a few of the places I hit.  Can't wait to go back!!


Pin It Now!

Saturday, June 9, 2012

Greek Yogurt Cheesecake Bars

I saw this recipe for strawberry cheesecake bars using Chobani yogurt.  Since I love Greek yogurt and mildly like strawberry cheesecake, I decided to turn it into something I do love, key lime pie!  Although not real key lime pie with condensed milk, this recipe made creamy lime squares with graham cracker crust that was just what I needed for my dessert fix.  And because it uses Greek yogurt for some of its creamy-ness its not that bad for you.

Preheat oven to 325 degrees,

For the crust:
Pulse 1 cup (about 7 sheets) of low-fat graham crackers in food processor
3-4 Tbs melted butter--I used melted coconut oil
1 tsb sugar
Combine in the bottom of a 8x8 pan, press down and bake for 10-12 min. till golden brown.  Make the filling while it bakes.


For the filling:
In your food processor or with a mixer, add:
1 cup Greek yogurt (I used 2% fat, but non-fat would work too)
8 oz non-fat cream cheese
3 large eggs
1/2 sugar (I used a little less, and used turbinado sugar)
3 Tbs flour (I used whole wheat flour, but I would recommend against it, gave it brown little flecks)
lime zest and lime juice to taste (about 1.5 Tbs juice, zest from one lime)

Remove pan from oven and pour in filling, tapping to make sure its level.  Bake 30-35 minutes till set but a little jiggly.  Cool on a wire rack and wait at least 2 hours while it chills in the fridge to cut into it.  I baked mine for 32 minutes and the sides were a little pale brown and the middle firmed up as it cooled.

I will be cutting mine into 16 pieces to share, also the calorie count looks better in my head :)  Enjoy!

Serving--one 1/16 piece: 110 calories, 4 grams fat, 9 grams sugar, 5 grams protein


Pin It Now!

Sunday, May 6, 2012

DIY Cubbie Bench


I am the proud owner of a new storage bench! I can't believe it has taken 2 years for us to find a storage solution for all our shoes.  Inspired by Ana White and her lovely website, I persuaded my sweet Father in Law and Hubby to tackle some plans for a three cubbie bench.  I found cute wire and burlap baskets I liked and decided to build the bench around them.  It wouldn't be a genuine custom piece without some modifications, we made our bench longer, wider, and added beefier legs.  I am so glad the guys were here to help, I could not have done it alone.  There was some serious math going on in the garage!


We used a sheet of plywood for the top and bottom and middle dividers, and had it cut to the desired width at the store.  We used 2x2's for the legs and 1x2's for the trim on the front.  We used wood glue, screws and finishing nails to hold her all together.  After sanding, I primed with two coats of Kilz Primer, then two coats of white trim paint. 

I found the cushion and pillows at HomeGoods, I was a little nervous I'd be ordering a custom sized cushion and would have to pay extra, but was happy when I found these.  Although not a perfect fit, I like the sunny yellow color.


Sydney dog decided to model the new bench.


The rug, also from HomeGoods started the color pallet.


The bench is the first step in the mudroom transformation.  We've waited awhile to do this, but I think its going to look great.  We are planning to paint the floor with Porch Enamel, not sure what color.
Also, I am going paint the walls and ceiling, perhaps a soft grey/blue color and new white baseboards.  I'm also painting the existing blue cabinets to match the bench, and will add some molding to give it some umph.  Also going to make some art with the help of my silhouette.  


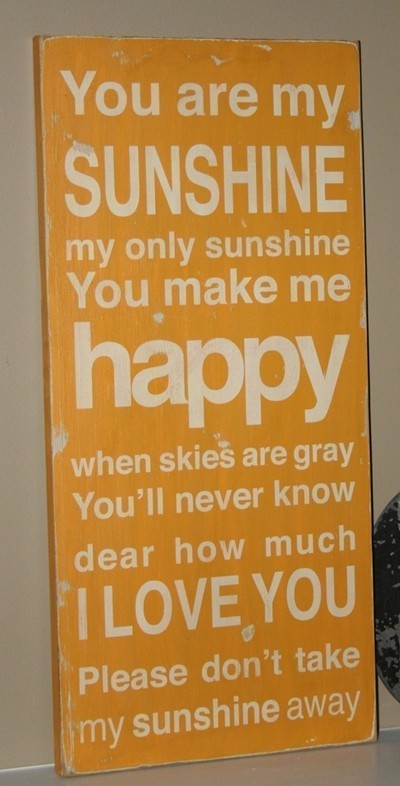
Perhaps yellow or white lettering on grey background?


Something like this fabric for some cute curtain on the patio door.


Printed and framed on top of the cabinets.

I'm excited to get this area looking nice.  We walk though the mudroom everyday, it will be great to see it all cheery and clean!  In the mean time, at least my slippers have someplace cute to hang out in.


Pin It Now!

Wednesday, February 22, 2012

Silhouette Is Here!

Eeeek! I haven't even taken it out of the box yet, and I'm soooo excited!  I wagered every holiday from Valentine's Day till my birthday to get one as a present from Hubby!  I sold him on the idea because it can make vinyl transfers for his motorcycle..(like he's ever going to get the chance to use it!!)

Have you heard of this wonderful machine? If you've read any DIY blogs, they are all the rage.  The Silhouette Cameo machine comes with different blade tips, and almost anything you can feed into the printer it will print/cut.  It works great on paper and vinyl but can work on other material too.


I want to share all the neat projects I've been dreaming up to use my Silhouette on.  Have you seen any creative projects?

Stickers & Labels


Don't peek, you might get some Limoncello for Christmas :) Oh, I NEED some of that striped twine, maybe in red?


Birthday Party Fun

I've wanted to make a birthday banner for a while.  I want something durable and fun colored that will last awhile and I can bring out for anyone's birthday.


Word Art and Wall Stickers


This quote always makes me think of my Oma, I want to put it on a canvas so I can take it with me when I move.  I'm thinking some yellow and gray is pretty together.


The laundry room could use a catchy saying, don't you think? Also want to post this on a canvas to take it with me :)

Glass Etching


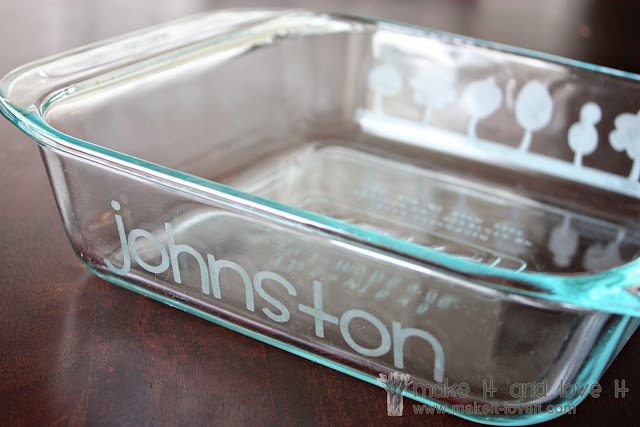
I love this idea, what a cute gift to give!  Thanks to the best MIL Kim, we've tried cutting the vinyl by hand and it's no fun, using the Silhouette will be much better!

Tattoos!


Yes, that baby is a hard core sailor.  Yes, I want to make some tattoos for a birthday party or bachelorette party!

Great Free Ideas

Ah, there is so much crafting to do! Can't wait :)
Pin It Now!